One of RV owners’ biggest nemeses is soft flooring, a problem that can be hard to prevent and expensive to fix.
Soft flooring in RVs is usually caused by water damage, breakdown of the foam layer in sandwich flooring, or structural flaws. Unless the damage is extensive, you can likely pull out damaged sections yourself and replace them with brand new wood.
The rest of this article will discuss soft flooring issues in depth.
You’ll learn the causes of soft flooring, how to check for soft spots, and the basic steps for how to replace sections of your RV subfloor on your own.
Water Damage
Without a doubt, the number one cause of soft floors in an RV is water damage.
RVs are notorious for suffering from water damage at some point in their lives; your vehicle has likely spent a lot of time outdoors, exposed to all kinds of inclement wet weather and storms, so it’s not surprising that at some point, water will find its way inside.
Sometimes the presence of water damage will be obvious, either from damp carpets or because of the general smell of mold or mildew.
Other times, water damage may go unnoticed, quietly wreaking havoc until something alerts you to the problem.
In addition to outside sources, remember that your RV has the potential to be damaged from the water on the inside, too.
Kitchens and bathrooms both use water for everyday purposes, plus the air can build humidity from cooking, drying wet clothing indoors, or poor ventilation.
Water can sneak in around windows and doors, near slide rooms, delamination in the walls, or the roof.
Wherever the source of the leak, water causes damage to RVs, and the damage is worse if the leak goes undetected (or ignored).
If water is the cause of your soft floors, be sure that you find and fix any leaks along with fixing the floor.
Sandwich Flooring
Many RVs use a flooring style called “sandwich flooring,” which essentially layers lightweight foam or styrofoam between plywood.
Sandwich flooring is popular because it’s lightweight, reducing the overall weight of the RV.
Over time, though, this foam starts to break down, especially in high-impact areas (are your kids jumping out of the bunk bed in the morning?) or in high traffic areas (such as right in front of the stove).
Depending on how this sandwich flooring is built and supported inside with cross beams, this failing foam may make the upper layer of the floor buckle underneath your weight.
The floor itself might not actually be soft, but it will certainly feel that way, and it still needs to be fixed.
Manufacturing Issues or Faults
It’s possible that what feels like a soft spot is actually something either structural or related to how the floor was manufactured.
And unfortunately, you likely wouldn’t be able to determine this for certain until you pulled up any carpet or laminate and got a look at the subfloor underneath.
One potential issue concerns floors that are not constructed of a single piece.
If there are any seams in the subfloor, it’s always possible that, over time, any adhesive or bonding agent between the individual pieces has deteriorated, which now allows the flooring sections to shift slightly when walking in that particular area.
Another concern is that, for whatever reason, the subfloor may not be properly supported via joists and crossbeams.
This would cause it to feel soft when you step on it because the floor is actually bending underneath your weight.
Unfortunately, an issue like this can only be detected by completely removing parts of the subfloor to see what’s underneath.
How to Find Soft Spots
As a responsible RV owner, you’re already likely checking your vehicle several times a year for water damage and other general maintenance issues.
Feeling for soft spots in the floor should be part of such routine inspections.
First, give the floors a visual inspection.
You are looking for stains in carpets, cracks in linoleum or another hard flooring, and other signs of damage throughout the surface floor and around the edges, where the floor meets the wall.
In bathrooms and kitchens, you might want to peek into lower cabinets for signs of damage there; if the cabinets are water damaged, they may have soaked through to the flooring underneath.
Also, check thoroughly near toilets, showers, and any sinks and areas near any water connection or water tank.
Next, walk every single inch of exposed flooring, ideally with bare feet, so that you can better feel any sinking or softness underneath your feet.
If the floor dips or compresses beneath your weight, you’ll want to inspect the area more carefully in the next step.
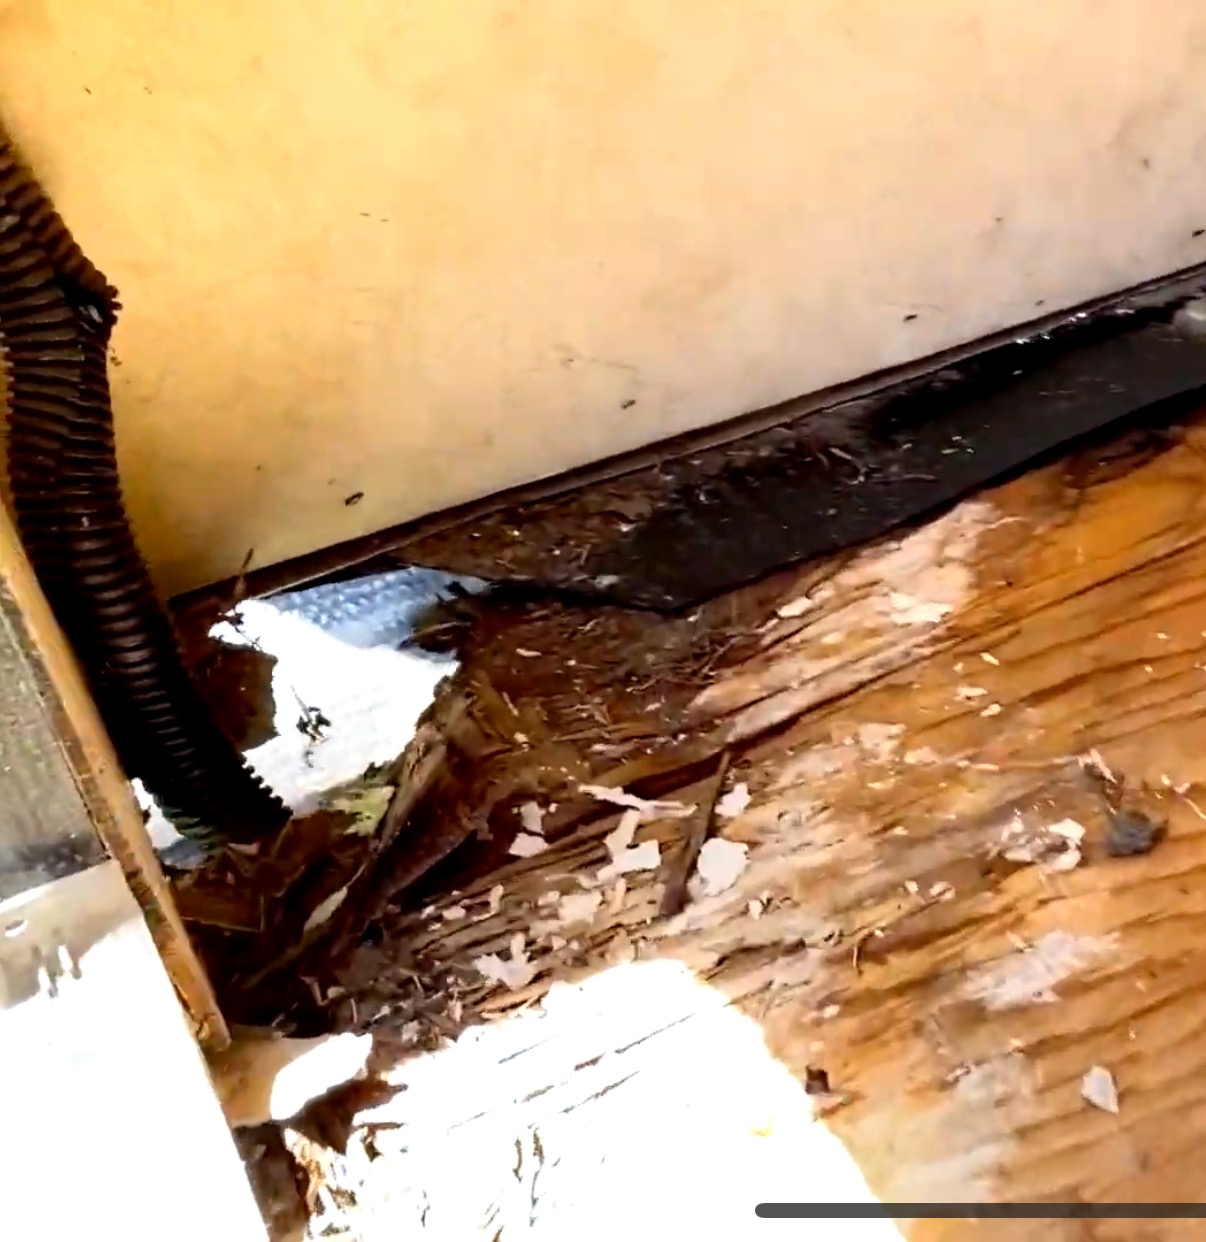
Once you’ve located any areas that look or feel soft, you’ll need to pull back the upper flooring to inspect the subfloor beneath.
With the subfloor exposed, water damage will be immediately obvious: the floor will be soft, soggy, discolored, and rotten.
You may also be able to see cracks in the subfloor or noticeable indentations or dips where the insulation underneath is compressed or deteriorated.
Other causes of soft spots may require a closer eye or perhaps a tactile inspection.
Up close, you’ll be able to see if the glue is deteriorating between subfloor board seams or to feel if the area is soft or spongy even if it doesn’t look like it should be.
How to Fix Soft Spots

You’ve found a soft spot, and you have a general idea of what the problem is. What do you do now? In this section, we’ll look at the steps necessary actually to fix soft flooring in your RV.
Get your tools, set aside a few hours, and get a helping hand to finish the task in half of the time.
Subfloor Composition
The first thing to consider is how the actual floor of your RV is constructed because this determines what you’ll need to do to fix it.
Most RV subfloors are constructed from particleboard, plywood, or a flooring style called sandwich flooring.
Particleboards are made of wood chips that have been adhered together with glue, usually water-based.
This mixture is pressed into the shape of a board and quickly dried.
The particleboard is a favorite construction material in RVs because it’s lightweight and inexpensive.
But if this kind of subfloor becomes damaged, especially if it’s water damaged, the trouble spreads quickly.
Particleboard subfloors are laid on top of cross beams and support joists.
Sometimes large sections of the floor are all one piece of the board; other times, multiple planks may be used, joined at the seams with adhesive.
Plywood is another common material used for RV subfloors.
Plywood is constructed of multiple thin layers of wood that have been glued together.
As with particle boards, plywood subflooring involves a framework of cross beams and joists that the plywood is secured to.
Plywood flooring may be one or just a few larger pieces or multiple smaller boards.
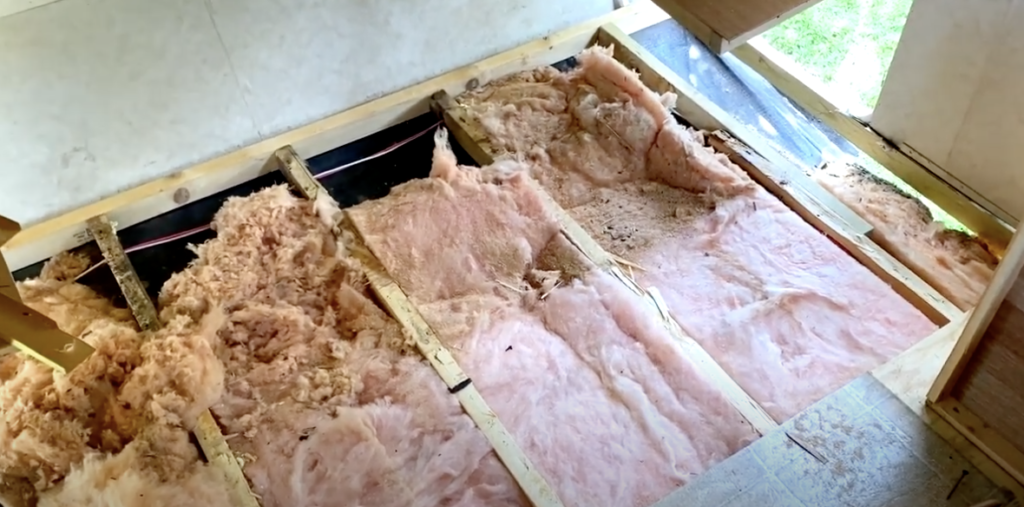
Sandwich flooring is something you’ll frequently see in a lot of RVs.
With sandwich flooring, the subfloor is constructed of multiple layers: two thin plywood sheets make up the “bread” of the sandwich, with a meaty layer of foam nestled in between.
Also in between are numerous cross beams for support.
This style of flooring is extremely lightweight, and many RV manufacturers prefer it. Unfortunately, as mentioned earlier, sandwich flooring is especially prone to creating soft spots.
Over time, the foam layer starts to break down, which allows the top layer of plywood to sag under the everyday pressure of people walking on it.
Determine the Extent of the Damage
Whatever the flooring type and whatever the cause of the damage, your next step is to determine exactly how far the damage has spread and what magnitude of a repair job you’re looking at.
If you haven’t already, it’s time to pull up whatever flooring is on top of the subfloor.
If it’s carpet, you will hopefully be able to pry it away with little difficulty; the chances are that if the subfloor is damaged anyway, any adhesive that originally bonded the carpet to the floor has broken down already.
Some laminate floorings may also be able to be pried away. Other types of flooring may be harder to remove without damaging them.
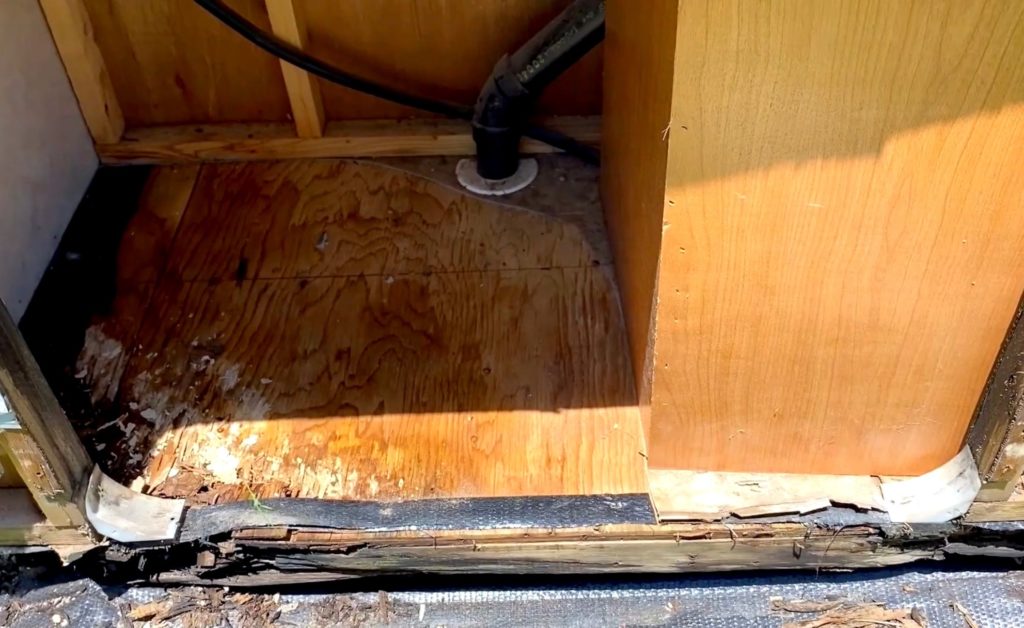
Once you’ve exposed the subfloor, you can figure out exactly which areas are damaged.
Draw a rectangle around the damage, and then draw a second rectangle surrounding that rectangle, with a few inches between the lines.
Rectangles with straight lines and right angles at the corners are not only easier to cut out, but they’re also easier to cut replacement flooring to fit.
You must go past the damage this way to ensure that you’re getting all the rot out. You don’t want to leave damaged wood behind accidentally.
If you’re dealing with particle boards, you’ll need to cut even further back into “clean” wood.
Water damage to particle boards causes it to, in a sense, dissolve.
If you don’t cut far enough away from the damage, you’ll end up with lots of messy fluff.
You may also want to consider locating cross beams and joists below when determining where to make your cuts.
If you can make your cuts immediately alongside any cross beams or joists, do so; it’ll be much easier to attach to your new wood.
Otherwise, you may end up needing to create new floor joists or cleats as you reinstall the new subfloor section.
Remove Soft Floor
Next, determine how thick the flooring is so that you can cut it out; one method is to drill a hole in an area with no joists or cross beams and then measure the thickness that way.
Carefully remove any nails, screws, or staples that will be near the cutting line. If these get nicked by the saw, they could fly out unexpectedly and cause injury.
Set a circular saw to the flooring’s exact thickness; this will ensure that you don’t damage any of the support structures as you cut.
Cut carefully along the line you drew.
Then pull out the old flooring. If you’re dealing with sandwich flooring, you may need to pry the old floor away from the layer of foam in between.
Note: Wood rot can cause the floor to cave in when you’re cutting it with a saw. If it feels wet or bubbly, you should keep your body weight away from the intended portion of the floor. Excess moisture leads to mold and rot, which is a major cause of soft floors in an RV (as mentioned earlier in the post).
Prepare the Subfloor for Its Replacement
Now it’s time to clean up the area in preparation for installing a fresh subfloor.
Start by removing any remaining staples, nails, or screws that either got missed or didn’t need to be removed for cutting.
Use a shop vacuum to remove sawdust and smaller bits of wood.
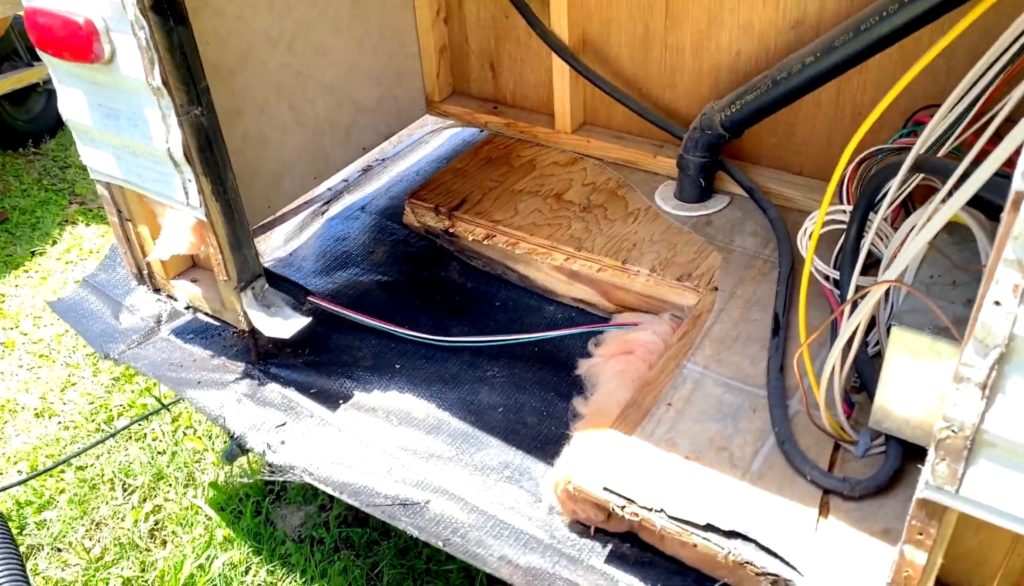
Next, figure out support. If you could cut close to any cross beams or joists, you could probably extend these, securely attaching a new section of the joist to the existing.
However, there will almost certainly be areas where the fresh wood is left hanging, not secured to the existing subfloor or the RV’s frame in any way.
It’s also possible that some flooring sections simply don’t have enough cross beams or joists in place for support, to begin with.
In this case, when you’re in there making your fix, you can add to the structural framework to prevent future problems.
In cases like this, you’ll want to build in cleats to support the new subfloor. A cleat is basically a piece of wood that’s attached to the underside of the old subfloor on one side, kind of like a tongue sticking out.
Install these cleats strategically around the edges of the hole you’ve cut, and you create a shelf of sorts to rest the new flooring on.
Use drywall screws or decking screws to attach the cleat to the existing floor. Place screws close together for maximum support.
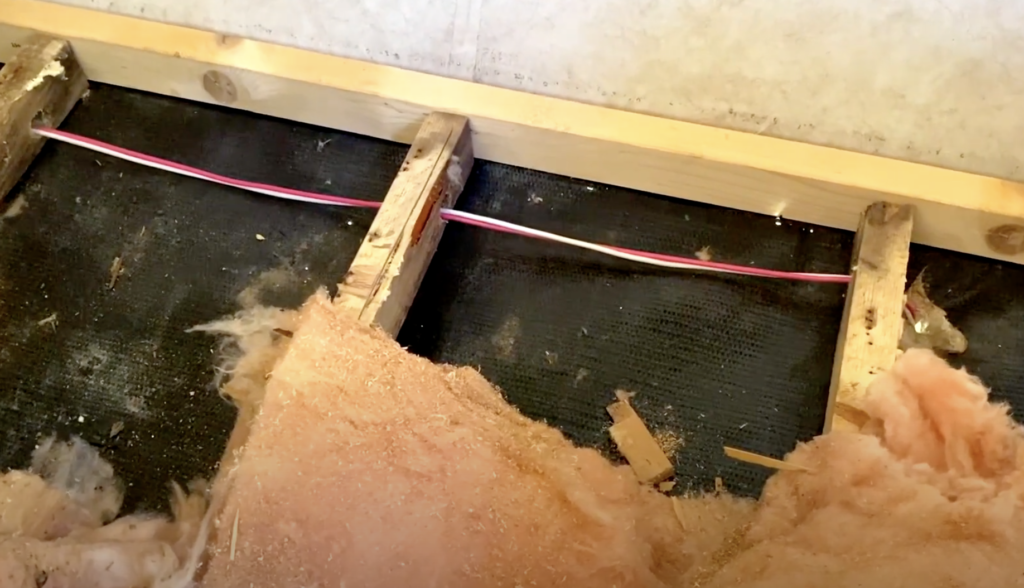
You may also need to install new insulation underneath the subfloor’s top layer, especially if your RV has sandwich-style flooring.
Measure the thickness of the preexisting, possibly deteriorating foam and buy something that will fit in place (you may need to go slightly thinner than the original).
After you remove any old foam, you’ll need to glue the new foam down.
Replace the Subfloor

Carefully measure the flooring section you’ve removed and use those measurements to cut a replacement floor piece out of plywood.
You’ll want to use plywood of the same thickness as the original subfloor. Consider using either pressure-treated plywood or marine-grade plywood to reduce the risk of future water damage.
Lay the fresh floor into the hole from the old floor.
If you’ve measured everything correctly, the floor should fit in neatly and perfectly, with no gaps around the edges or any amount of wiggle room.
Use decking screws or drywall screws to attach the new subfloor section to the cross beams, joists, cleats, or whatever else will be supporting it.
Place them relatively close together, not more than six inches apart.
Finally, if there are any gaps or any other cracks or irregularities that spring up in this process, they’ll need to be filled with bonding agents to strengthen the floor.
There are many different opinions on what to use here, but keep in mind that whatever you go with needs to handle the roughness of life on the road. There will be bouncing and bumping.
You may be able to find a glue or adhesive of some sort that will work. You might also want to consider automotive-grade body filler.
Once the subfloor is fixed, you can replace the old carpet or flooring on top or install a new flooring if you prefer.
Conclusion
Soft flooring is one of the biggest things you should be checking in your frequent physical inspections of your RV.
Damaged flooring not only feels unpleasant to walk on, but it can actually be dangerous; if the problem gets too bad, you risk making a full-on hole in the floor.
Many soft flooring problems are caused by water damage, which can rot out the subfloor and damage your vehicle’s overall structural integrity.
Soft spots are also common in RVs with sandwich flooring. Sometimes, your particular RV may just have manufacturing issues that contribute to it.
Fortunately, many soft spots can be repaired at home with the right tools and knowledge.
With a little know-how, you can fix your flooring for a fraction of what a repair shop would charge.


One Response
This is a great article. We have a 2007 Jayco Jay Flight 5th wheel, with soft floors in the kitchen area. We are trying to sell the unit, but of course, with soft floors in spots, prospective purchases are Leary. So, we removed the carpet and Lino to make sure that there is no water damage, and thankfully there isn’t. But what we can see, is that the flooring is the Luan sheeting, and the foam has clearly collapsed in the high traffic areas. So now, we are wondering what the best repair solution is. We are thinking about the Epoxy injections, but that looks awfully messy, and we aren’t sure how long that will last. On the other hand, we are wondering whether if we remove the sheeting (subfloor) in those weakened areas, and replace them with proper plywood the same thickness, and if necessary, add a few additional cross struts for support, would we have to do that from underneath the RV, or should it be done from above? Also,have you ever removed this Luan sheeting? And is it difficult? Obviously, we don’t want to have to remove cupboards etc. just those soft areas.