Just like any other vehicle, your RV needs regular maintenance not only inside, but up top as well. When an RV’s seals go, water seeps in and creates untold damage. Be sure to keep your RV roof sealed and watertight by carrying out routine checks of all compromising locations.
An RV roof should be resealed at least once a year to guarantee waterproof seals. Be sure to check your RV roof once every six months for signs of wear or other issues. It takes only half an hour to do a thorough check of them and it will save you a fortune in the long-term.
This article will talk you through:
- What material RV roof you have
- What types of RV sealant there are
- The best sealant for resealing an RV roof
- How to re-caulk your RV roof seals
What Material RV Roof Do You Have? (And Why It Matters)

RV roofs are made of one of the four materials. The four most common types of RV roof are:
- Rubber EPDM ((Ethylene Propylene Diene Monomer)
- Rubber TPO (Thermal PolyOlefin)
- Fibreglass
- Aluminium
The simplest way to tell which type of roof your RV has is to check your owner’s manual. This will show the roof material and contain the manufacturer’s guidelines on how to care for your roof.
What’s the material type got to do with the maintenance of seals?
Each material behaves differently and develops issues associated with the material. You also want to know what roof type you have so you can pick out the best RV sealant for the job.
What Types of RV Sealant Are There?
It’s overwhelming as you first look at what’s available on the market in sealants. How can you choose which is the best sealant for your RV?
Here are the three types of sealants that are available:
Urethane Sealants
Urethane sealants deliver longevity, durability, and stickiness. It’s an organic material so, unlike its non-organic cousin, silicone, it will break down quicker under the elements.
Expect up to a ten-year life from urethane sealants that receive minimal UV light exposure or minimal movement. The pay-off of using this sealant is that it can be painted over.
Silicone Sealants
Silicone sealants are man-made, and because of this, they’re more able to withstand the elements. They can withstand movement more effectively, as well. And, if your RV is subject to extreme hot or cold temperatures, silicone’s lifespan will beat that of urethane sealants.
However, the downside is that it’s more expensive, cannot be painted over, and tends to draw dirt.
Acrylic Sealants
Acrylic sealants deliver on affordability and can be painted over. However, that’s where the pay-offs end for acrylic sealants, especially if exposed to the elements.
They don’t offer the durability or lifespan of silicone. You’re more likely to consider acrylic sealants for interior work.
The Best Sealants for Resealing an RV Roof
When you drop onto RV forums to find out what’s being said about RV sealants, you get a mix of feedback. Some prefer one type over the other.
It can be confusing at best. That aside, here are the RV roof sealants we rate as best for keeping your RV watertight:
Dicor Self-Level Lap Sealant

Dicor Self-Leveling Lap Sealant is an industry go-to. It is treated to withstand UV, so you’ll get longevity. It’s also a versatile sealant able to withstand various situations and is compatible with different roof types.
However, because Dicor is self-leveling, it is “runnier”. While it will seep into cracks and nooks to fill them up, you’ll want to use a different type of sealant for vertical surfaces.
Geocel Pro Flex RV Flexible Sealant

Geocel Pro Flex RV Flexible Sealant is your sealant of choice for seals on the vertical sides of your RV. It’s easy to smooth into the seals, does not hold onto dirt, offers flexibility, and is UV resistant.
We recommend using mineral spirits to get a smooth finish. Manufacturers state that it can be applied to damp surfaces, is paintable, and delivers on flexibility, too.
Sikaflex 221

Sikaflex 221 offers fast-curing adhesion to just about any surface. It’s designed to weather extreme conditions and endure the vibrations and shocks that thousands of miles deliver. Once on, you can sand it down and paint over it.
Sikaflex 715

Sikaflex 715 delivers high internal strength and is self-leveling, so it’s going to drop straight into those hairline cracks and gaps to offer a solid seal. It offers flexibility and durability to boot.
As with the Dicor 501LSW-L, use Sikaflex 715 on horizontal surfaces only and be sure to follow manufacturer instructions.
3M Marine Adhesive Sealant 5200

3M Marine Adhesive Sealant 5200 is designed to be submerged in seawater. For this reason, it’s highly durable and great for bonding. Its manufacturers promise it’ll remain strong and flexible, capable of withstanding vibration or structural movement.
Many folks recommend this for RV applications as well, but a word of caution, use this only when certain you will not want to remove it.
EternaBond RV Rubber Roof Repair Tape

EternaBond is a tape sealant that can be placed over joints in just a few minutes when needed. It can be applied to any roofing surface, from EPDM to TPO, to deliver a watertight seal.
A pro tip for sealing your RV is to apply regular caulk along the seals, let it cure, and then apply EternaBond Tape on top for a double seal.
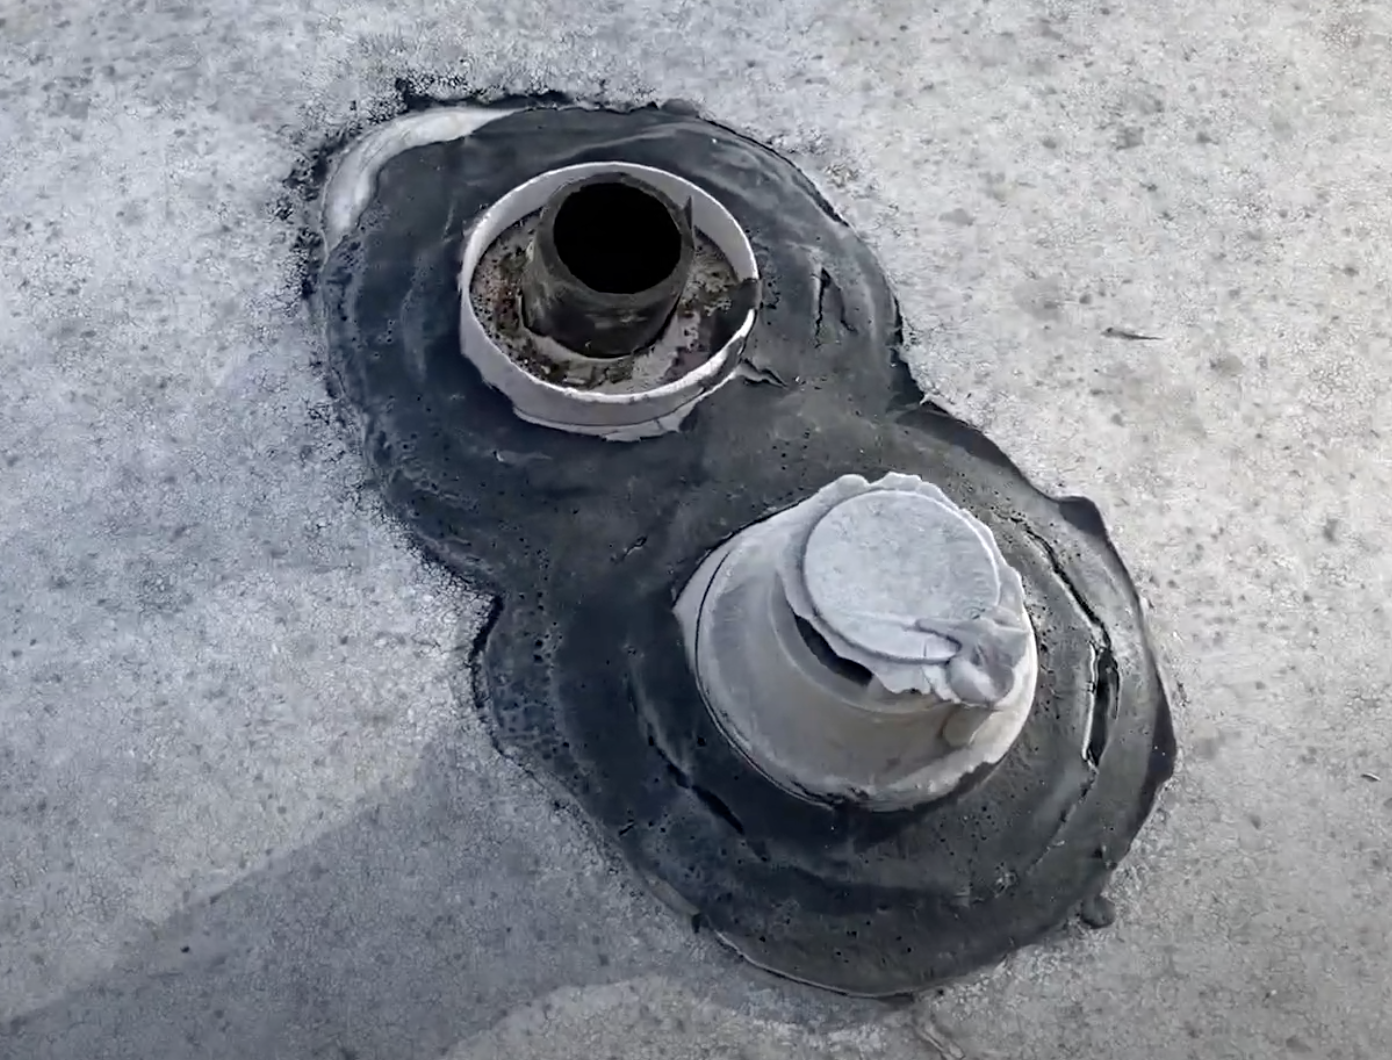
How to Caulk Your RV Roof

To do a thorough job of re-sealing the seals on your roof, I recommend taking the following steps and be sure to do this when the weather calls for a dry spell.
Follow these steps to reseal your RV seals:
- Check and clean existing seals. Once you’re up on the roof, check seals for brittleness and cracking. These are sure signs it’s time to peel back the old sealant completely. But, if the existing sealant has some movement and flexibility, it’s still in good condition. There’s no need to replace perfectly adequate sealant.
- Clean the seals. To be certain the seals are in good condition, clean them to get a good look. For fiberglass or Aluminium roofs, use a solvent like acetone to clean up the seals so you’ll be able to notice if there are any wear and tear.
- Remove old, brittle, and cracked sealant. Use a blunt-edged tool to scrape off the old sealant. If you discover silicone, be sure to remove all of it since nothing sticks to silicone and you’ll want to replace it.
- Prepare the surface. Clean and dry the surface/seal. With TPO or EPDM, use soapy liquid to remove the dirt, then let it air dry. For Aluminium or fiberglass, acetone will clean up the surface. Again, wait for the area to dry.
- Apply caulk. Before applying the sealant, ensure the surface area is dry. Be sure to cover the joints fully with the sealant. Use your fingers to smooth the sealant (except for self-leveling). Check there are no gaps that water might get into it.
If your old sealant is still in good condition with no sign of cracks or gaps that water can get into, there’s no need to reseal the joints. However, if you have any doubts, peel off the old sealant and re-caulk.
Or, for a less time-consuming approach, it’s sometimes acceptable to place new sealant over the old sealant. Be sure to read the instructions on your caulk, too, to ensure compatibility.
Final Thoughts
Routine checks of your sealant for brittleness or cracks will ensure you stay on top of the maintenance of your RV. Check at least every six months and be prepared to get out the caulk gun once a year. This way, you’ll keep your RV in tip-top condition.


