There are a number of reasons you may want to remove the air conditioner from your RV or camper trailer. You could be performing maintenance, replacing the entire unit, or simply removing it so you can replace or repair your roof.
Whatever the reason may be, if you need to perform this task, it may be a little intimidating. However, it’s not as bad as it may seem. We recently went through this process and thought we would share the experience.
Safety First
I’m not an electrician and I am not certified to teach you the proper way to deal with anything related to electrical work. I’m simply showing you what I did and the steps I followed for this project.
Electricity is the real deal and it is up to you to ensure your own safety. Do not attempt any of this without knowing 100% that all power sources are disconnected and that you have a safe work environment.
When in doubt, seek guidance or hire a professional to perform these tasks!
How to remove an RV A/C
MAKE SURE ALL ELECTRICAL IS DISCONNECTED!
Truth be told, removing an AC unit is pretty easy and there aren’t that many steps in total. Let’s start inside your rig before we move up on top.
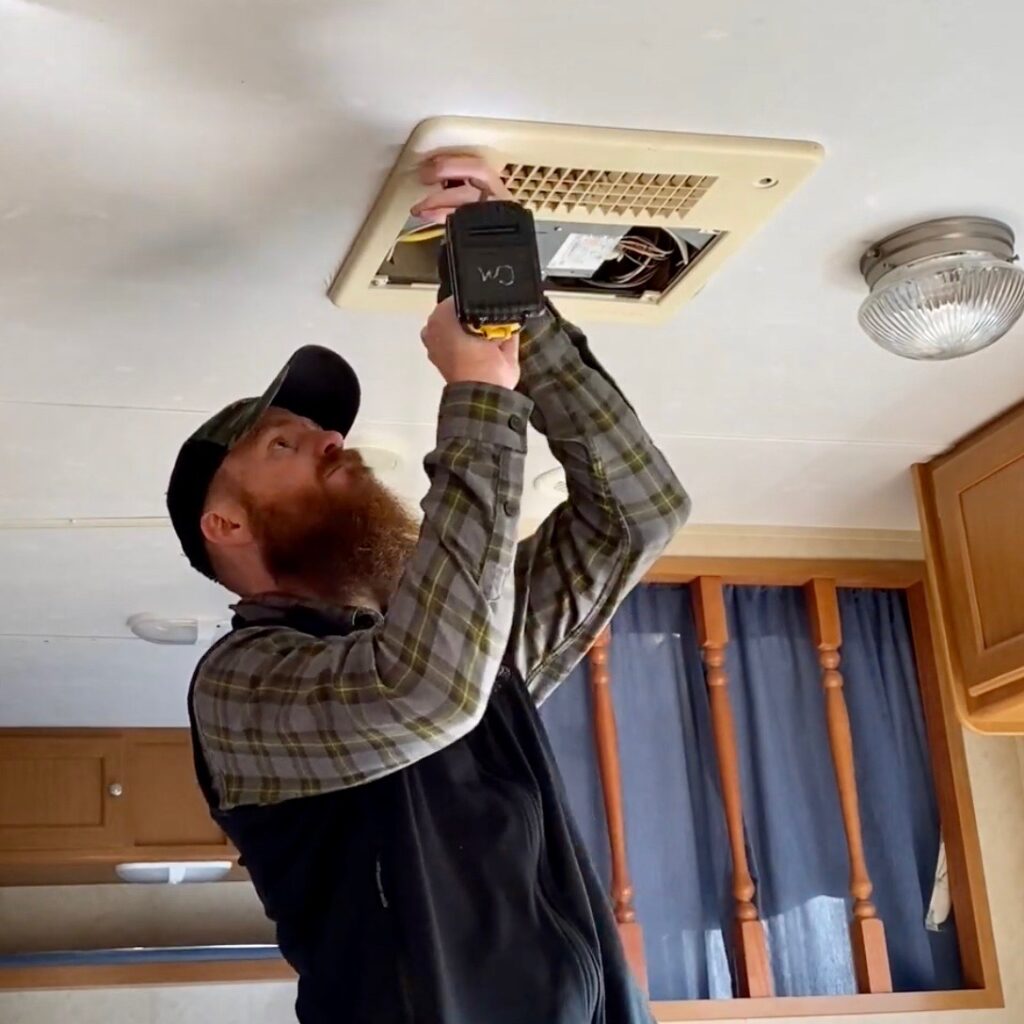
To get thigs started, go ahead and pop off the air return grill, which should just have a couple of clips or tabs holding it in place. This will reveal 4 of the 6 total screws you will be removing. Set the grill aside and out of the way.
There are 2 screw cover tabs that also need to be popped out giving you access to the 2 remaining screws. Once those are out, you can go ahead and remove all 6 screws and the entire cover will come off.
The next step consists of removing 4 long bolts that are used to secure the internal components to the unit on top of your rig. These are found in each corner of the metal mounting bracket you exposed by removing the plastic covering.
Grab a ratchet and the appropriate socket and remove all 4 of these screws. Trust me, they are long. Get ready for a little forearm pump.
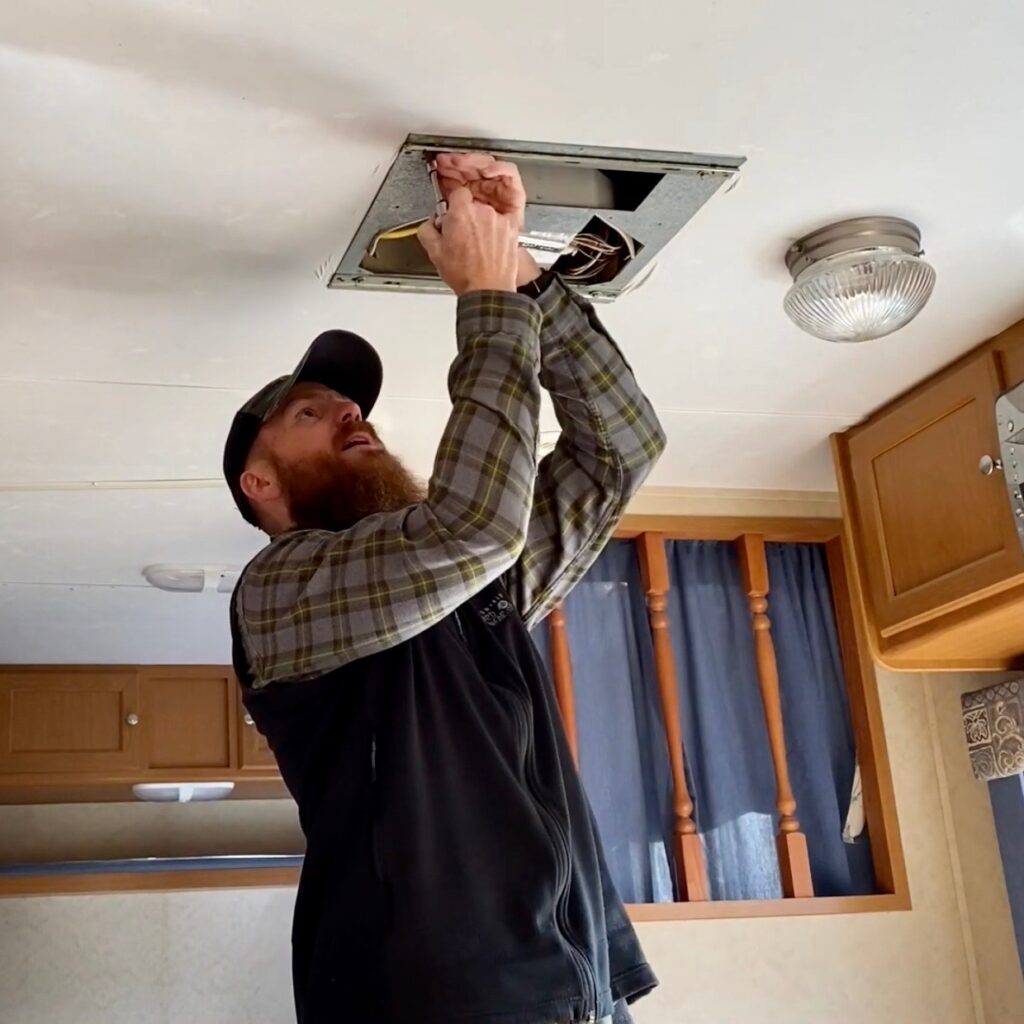
Now that the bolts are out, go ahead and remove the metal housing. Mine fit pretty snug so I gently worked it out one side at a time. Now, all you have is the electrical connections holding everything in place.
There were two electrical connections on my unit that needed to be disconnected. One bundle of wires easily disconnects on the outside of the unit. Go ahead and unclip it.
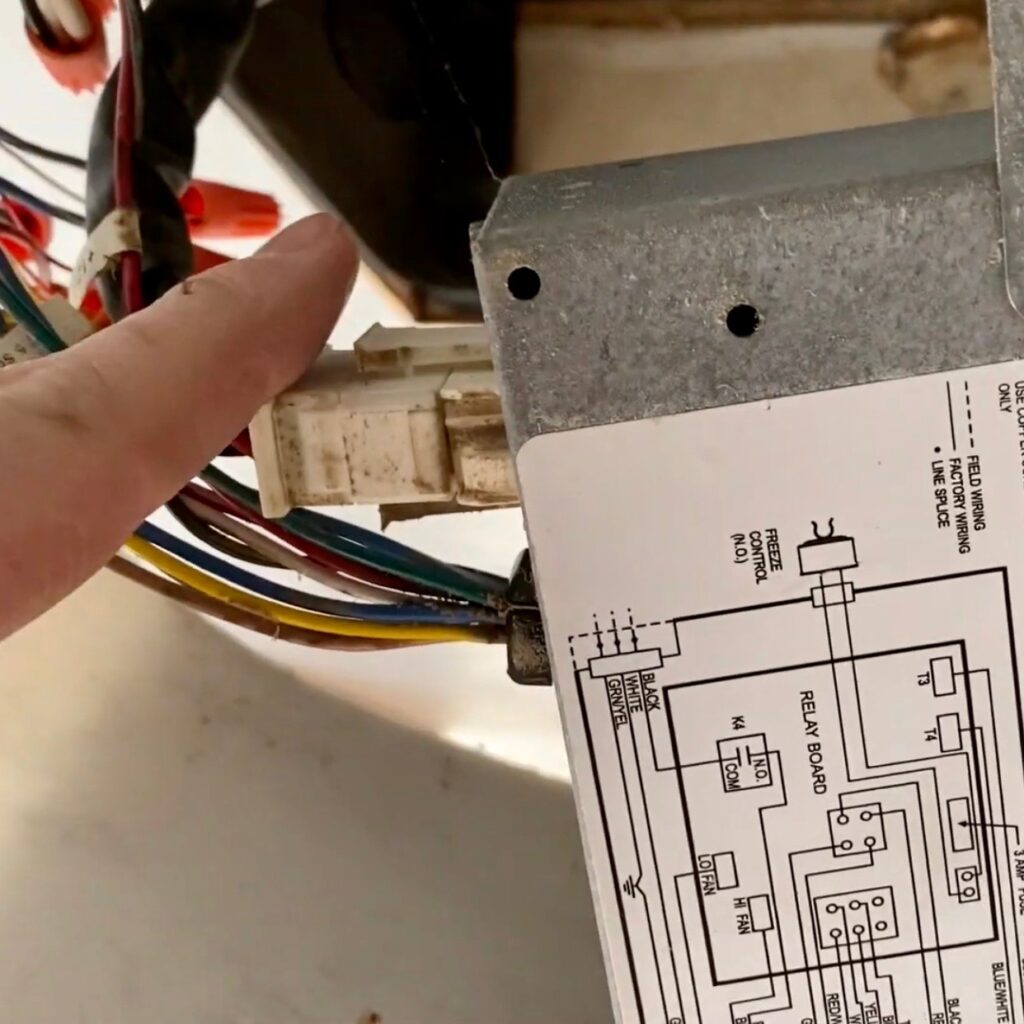
Now that you have disconnected that wire bundle, there are two additional wires that are plugged in inside a covering. This panel covering is attached with one screw and once removed, give you access to the wire clip inside. Go ahead and remove the covering and disconnect the wires.


Once that wire bundle is disconnected, there is nothing left holding the bottom unit to the top. You can just let it hang on the wires that are still disconnected. This shouldn’t be an issue, but to be safe, make sure nothing is in a bind or getting pinched in a way where it will compromise any of the wires.
You are finished on the inside. Let’s head up on the roof and finish the removal.
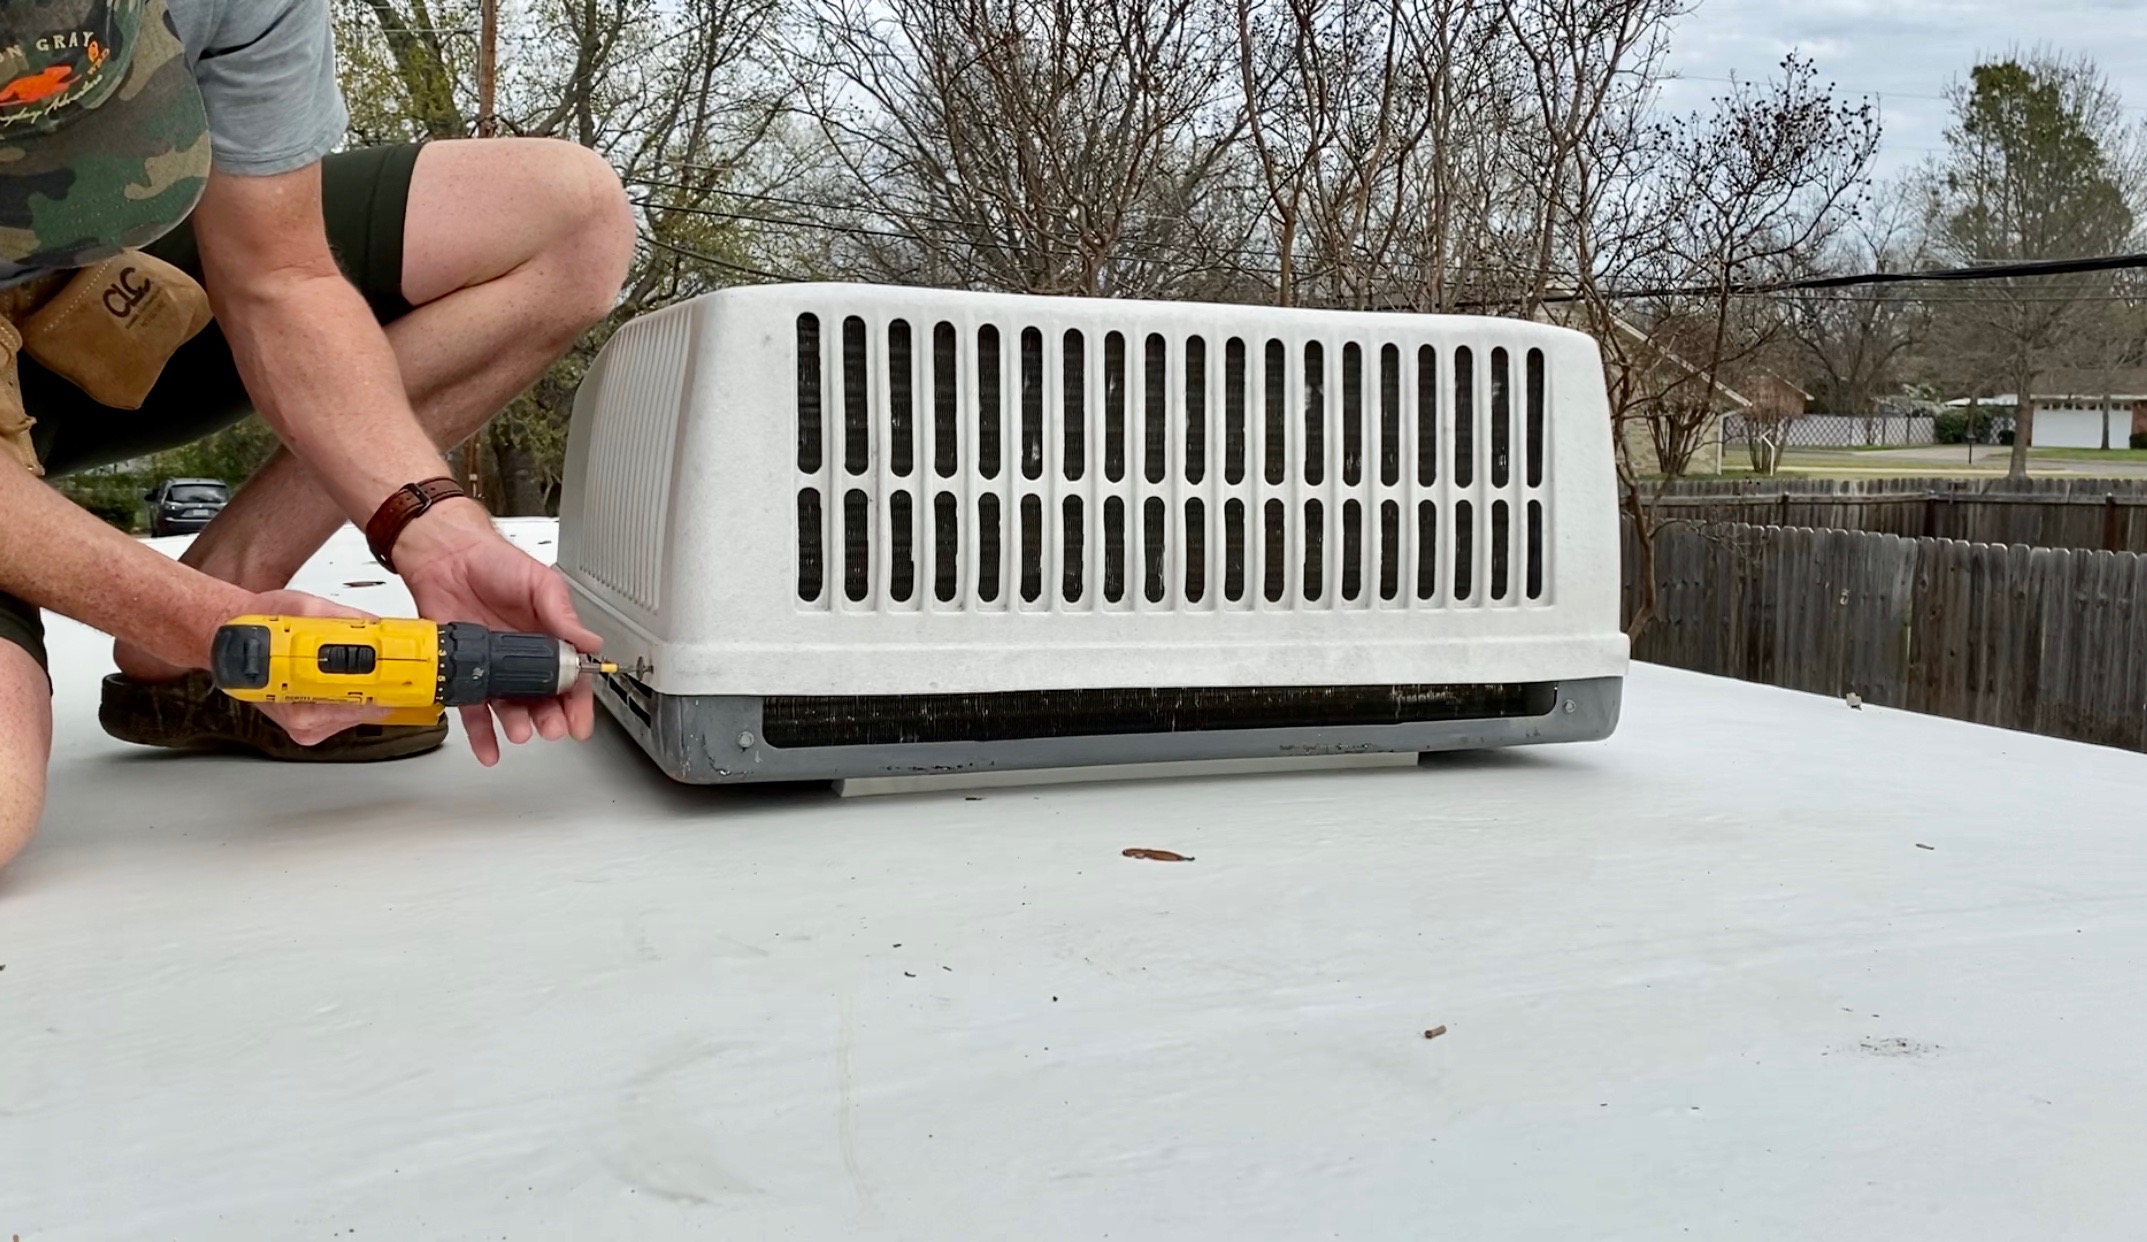
The shroud over the AC is easily removed and is attached via screws on each of the sides. Remove all the screws and take your time lifting the cover off the base of the unit.
These usually fit kind of tight (friction) in addition to the screws that were holding it in place. Once it is off, set it on the ground. You don’t want a gust of wind blowing it off the roof and damaging it.
To complete the removal, slowly lift or pry up the edges of the AC unit working your way around. This will help break the gasket free if everything is a little stuck in place.
You will be able to feel everything coming loose, letting you know you are almost there. Once you feel it is completely free, it is time to either set it aside or remove it from the roof completely.
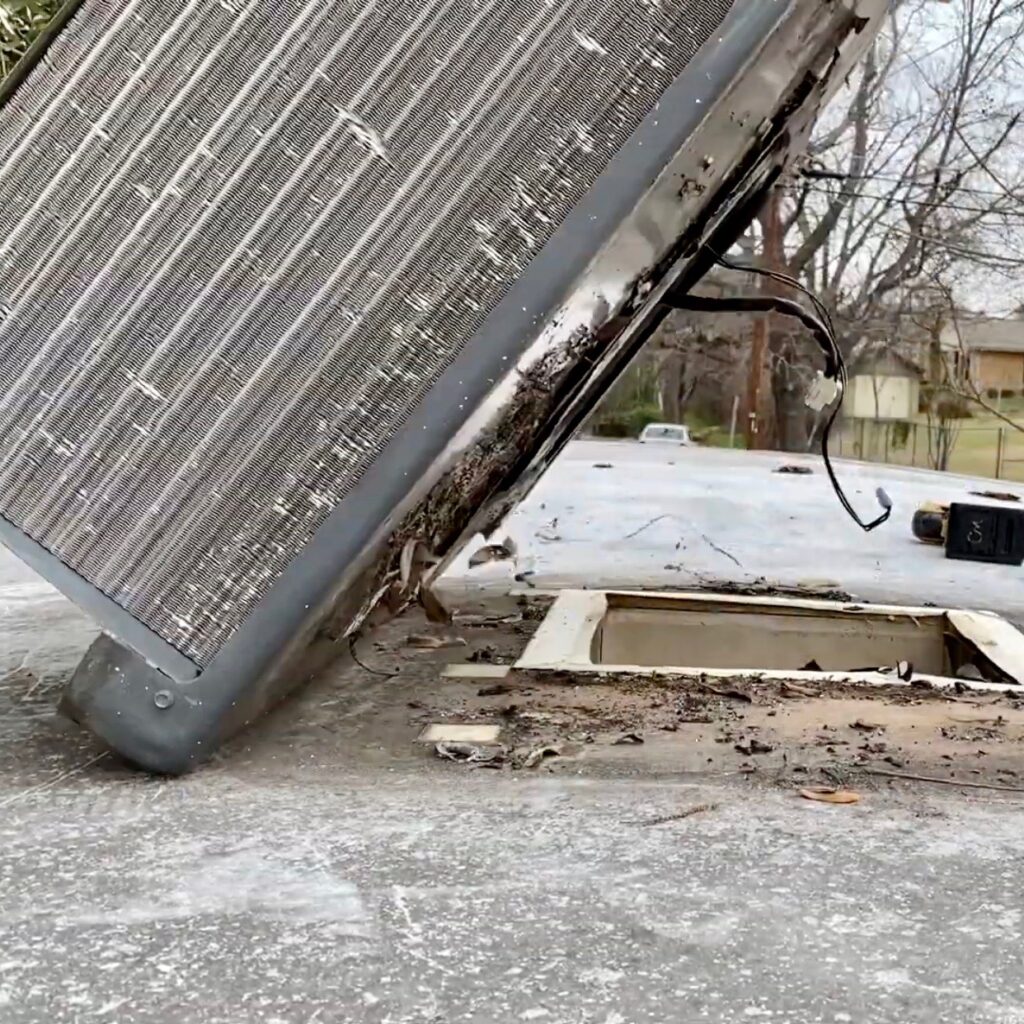
These units are somewhat heavy and bulky and will more than likely require 2 people to get it off the roof. Be careful during this step and once you get it down, go ahead and stash it out of the weather.
How to install an RV A/C
Okay, so now we are at the point where you have finished up your project and it’s now time to install the AC again.
One thing I would suggest is replacing the gasket on the bottom of the unit. You never know if it may have been damaged (even slightly) during removal.
A replacement is cheap and it will offer peace of mind. I bought a universal gasket off of Amazon and it seems to have worked just fine for my application.

Once the new gasket is securely attached to the bottom of the unit, go ahead and center the unit back over the AC opening. Just get it close because you make the final adjustments once you get back inside the camper.

Head back inside to finish up.
Now that you are inside, you can check how centered the unit is over the opening. Go ahead and make any final centering adjustments from the inside, making sure everything is spaced properly.

Let’s go ahead and reconnect the two wiring harnesses we disconnected during removal. Remember to reattach the metal covering that goes over the clip inside the unit. The other wires connect outside the housing. Boom…all the wiring is back in place.


Now, it’s time to get a good forearm pump again. Grab the 4 long bolts you removed earlier. It’s time to attach the bottom unit back to the top. Slide the bottom back into place, which will be a little tight, and make sure everything lines up.
Grab the ratchet and socket again and get all 4 bolts started. Double-check everything again and make sure no wires are pinched or in a compromising position. If everything looks good, start working your way around each corner tightening the bolts incrementally.

Once it starts to get snug you will be able to see the gasket start to compress. Don’t overtighten, just make sure its snugly in place in order to maintain a watertight seal.
Reattach the faceplate/covering and then the grill insert. Once that is wrapped up you should be good to go. A quick check to make sure everything is operational is not a bad idea.

Now, head back up top and reattach the AC covering. Center it over the unit and work it into place making sure the screw holes line up. Once everything is lined up, install the screws.
Congrats…you did it! Now go celebrate.
Conclusion
Hopefully, this removed some of the mystique and hesitation preventing you from tackling this project by yourself. It’s actually pretty easy and can be accomplished any pretty much any DIY’er.
Even if you have a different rig, the premise will be basically the same. Now that you have an idea of the overall project, feel free to move forward with confidence.


